.jpg)
Yesterday we were invited for dinner with some good friends and I had intended making and taking along a pumpkin pie. Time escaped me though and since the kitchen is not my favourite room in the house I opted instead to take chocolates. To spruce up the offering and hide my baking inadequacy I made a bunch of felt roses to embellish the top. I enjoyed making them and the gift was well received so I thought I'd share how I made them with you.
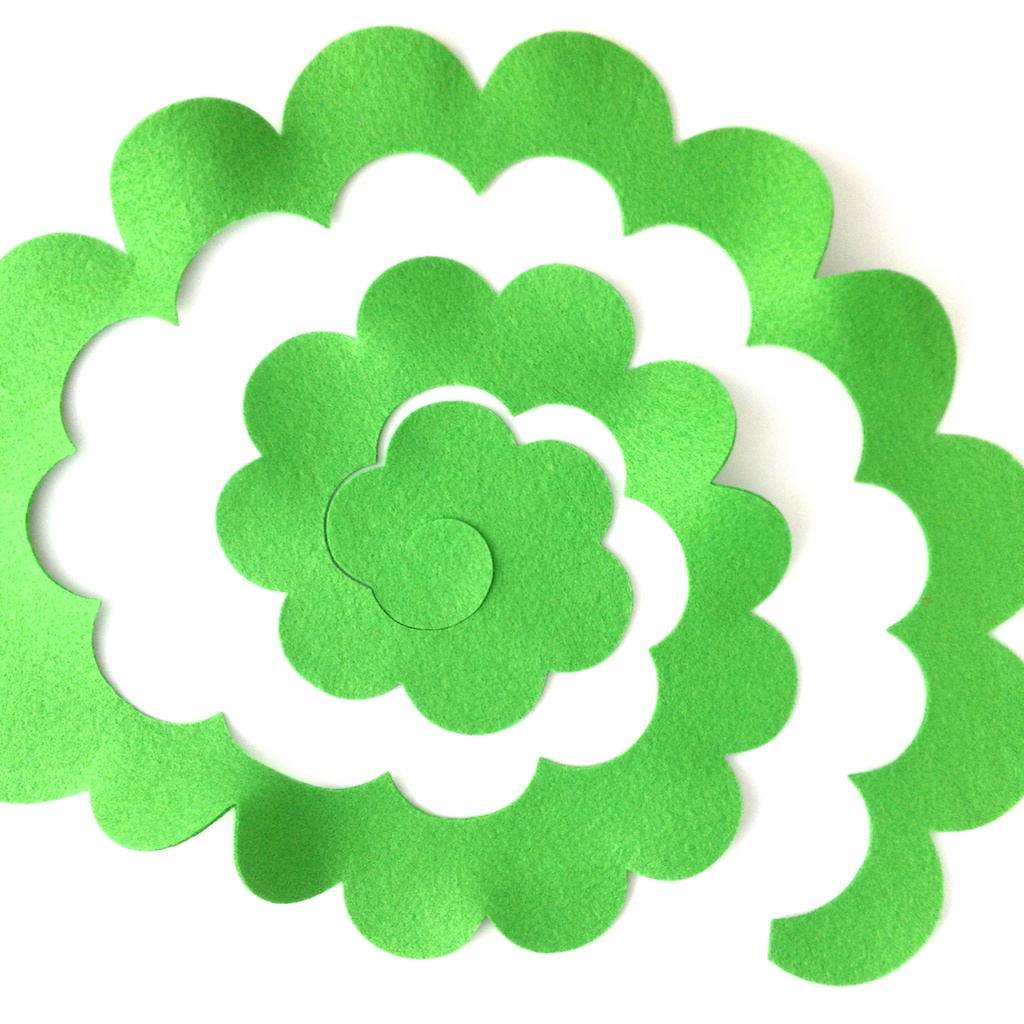
Now I suppose I am lucky that I have a Sizzix Big Shot and this lovely 3-D Flowers #2 die. The larger flower produces a rosette around 3.5" and the smaller around 2.25". The Big Shot is a die cutter - a bit like an Accuquilt (I have one of those too ... yes my secret obsession is emerging here!) Die cutters make life so easy when it comes to cutting odd and complicated shapes - these flowers included although you know I think you could easily get away with cutting this shape freehand and still get great results. Its hard to see but the die essentially cuts a very long scalloped strip of fabric that spirals round and round and once you have your strip you simply roll and glue to make the rosette. Simples! It did take me a couple of goes to get the shape right mind. But anyway heres how I did it in pictures!

Sizzix 3-D Flowers #3 Die number 657153
I used a 10" square of the Xotic Bamboo/Rayon blend felt we have just got in the shop for each rose and I cut out the larger flower size.
For the chocolate roses I chose Fuchsia, Sangria, Passion Flower and Pina Colada
(Great names aren't they!)


For the tutorial here I am using Pirate Cove (thats the green) and Macaw Red

Cut out the spiral scallop strip

This is the spiral uncurled

Now you need glue. I tried sewing them first and it just didn't work as well so sorry folks I have resulted to textile glue.
I used Gutermann HT2 Textile glue since I had it on hand and it works brilliantly.

Put a drop of glue on the end of the spiral that starts at the outside (not the bit in the centre)

Fold it over and start to coax it into a curl.


Add more glue dabs at each scallop tip.
When I made the first few I added glue right along the inner edge but you don't need to add that much at all. A small drop every now and again is enough to keep the shape and stop the rosette unfurling.

Start to roll - trying to keep the bottom edge even.
Add more glue drops as needed.

Once you get to the bottom put a larger dab of glue on the base and sit the rose upright. Press lightly to create the rose. You will have enough time at this stage to mess around with the shape before the glue dries.
Some rossettes I rolled quite tightly and other I left a little looser.


Let the roses dries for half an hour or so and then add to your chosen chocolate box!
To fix them to the lid I used strips of double sided tape which is enough to stop them falling off but not so permanent that they can't be removed and used for something else after the chocolates have gone!
.jpg)
I'm going to make more red and green roses now and make a christmas wreath next I think.

This is the spiral shape by the way. I think you could easily cut this with scissors but it will take a good deal longer than a die cut of course.
What do you think .. should I add some die-cut felt pieces to the shop?
These roses are gorgeous -- you made the process look so easy, too. What fun!
ReplyDeleteDiane
No they really are easy!
Deletethey are fab.
ReplyDeleteThank you!
DeleteFabulous! I think it would be a great idea to add some precut to the shop!
ReplyDeleteComing soon Gill - just sorting the packaging!
DeleteSuper.... I have an Accuquilt and have been eyeing the Sissix too... Was thinking about setting up a 'Die exchange' as they are rather costly but I guess you can put yours down to business expenses.... :-)
ReplyDeleteAre you going to FQ Retreat next year?
I love these flowers - thanks for the tutorial - must try these.
ReplyDeleteGreat tutorial.
ReplyDeleteI would definitely be up for some precuts in your shop. Nudge me on the Bee when they are in, if poss.
xxxx
Do you ever cut for other people?
ReplyDelete